Your complete guide to ACME SSL
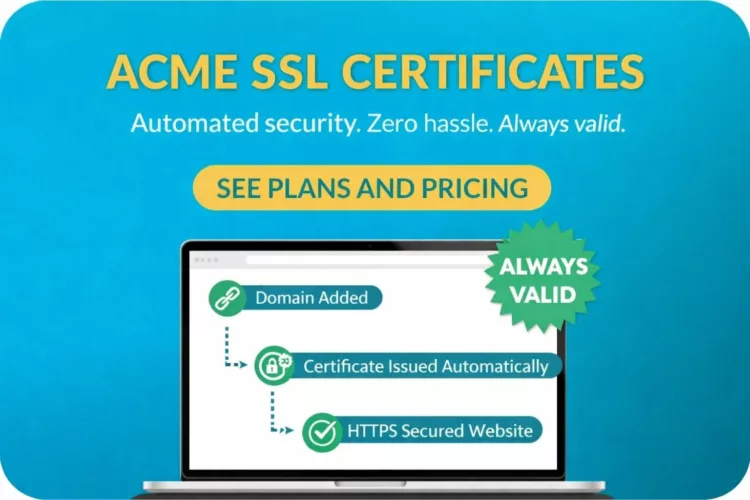
In this guide, we explain what ACME SSL certificates are, who they’re built for, and walk you through the full step-by-step installation and setup process.
1. Introduction
Back to basics: what are SSL certificates?
Imagine you own a store where customers come to buy your products. Naturally, you want to ensure their transactions are secure, especially when they share sensitive information like credit card details.
An SSL certificate acts like a digital security guard for your website, creating a protected connection between your customers’ web browsers and your server.
An SSL certificate helps protect your customers’ sensitive information such as:
- Credit card numbers and payment details.
- Personal information like names, addresses, and phone numbers.
- Login credentials like usernames and passwords.
Beyond protecting data, SSL certificates can also improve how customers view and interact with your website:
- Protection: They help keep customer information secure, which matters if you accept payments or store personal information on your website.
- Trust: When customers see the padlock icon in their browser bar, or a web address starting with “HTTPS” instead of “HTTP,” they feel more confident doing business with you.
- Better Google ranking: Google favors secure websites. Having an SSL certificate may help improve your site’s visibility in search results, making it easier for new customers to find you.
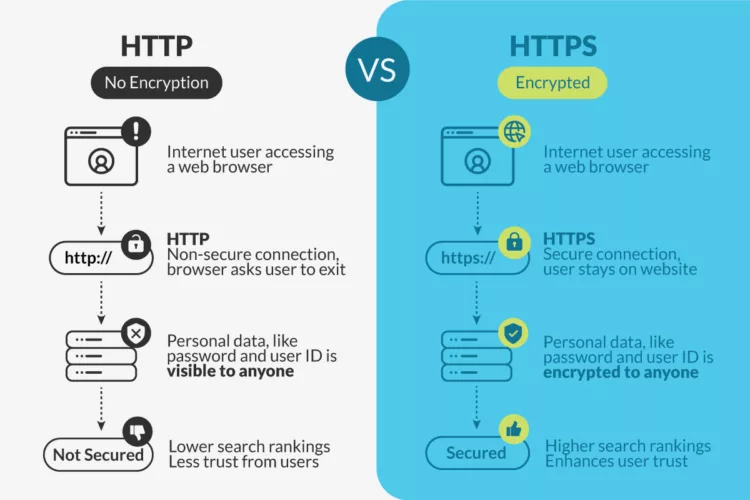
The hidden risks behind SSL certificates:
As you can see, SSL certificates are no longer optional. But managing them manually? That’s where things get tricky!
The industry reality
Running a digital website requires precision and perfect timing. “We’ll get to it later” is just not good enough. Today, you’re dealing with:
HTTPS by default: Browsers actively flag non-secure sites. Any time without the proper certificate can lead to lost visits and sales.
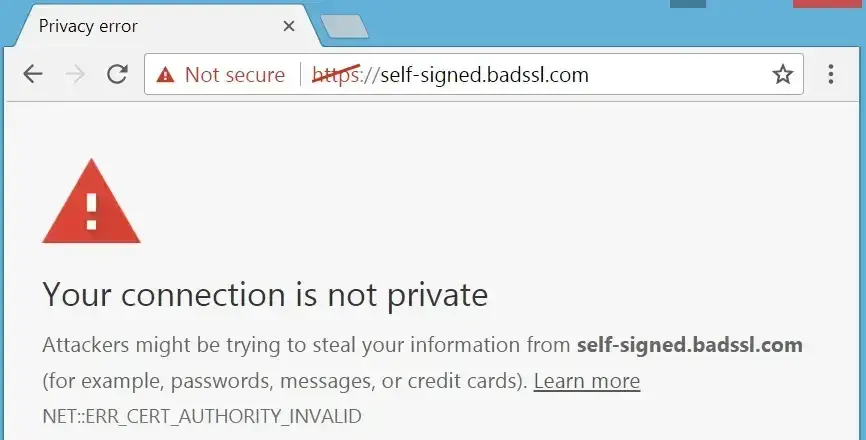
SSL Cerfificate errors lead to users viewing screens like this one
Shorter renewal cycles: As the digital world moves towards a 47 day validity period, certificates need to be issued and renewed more often.
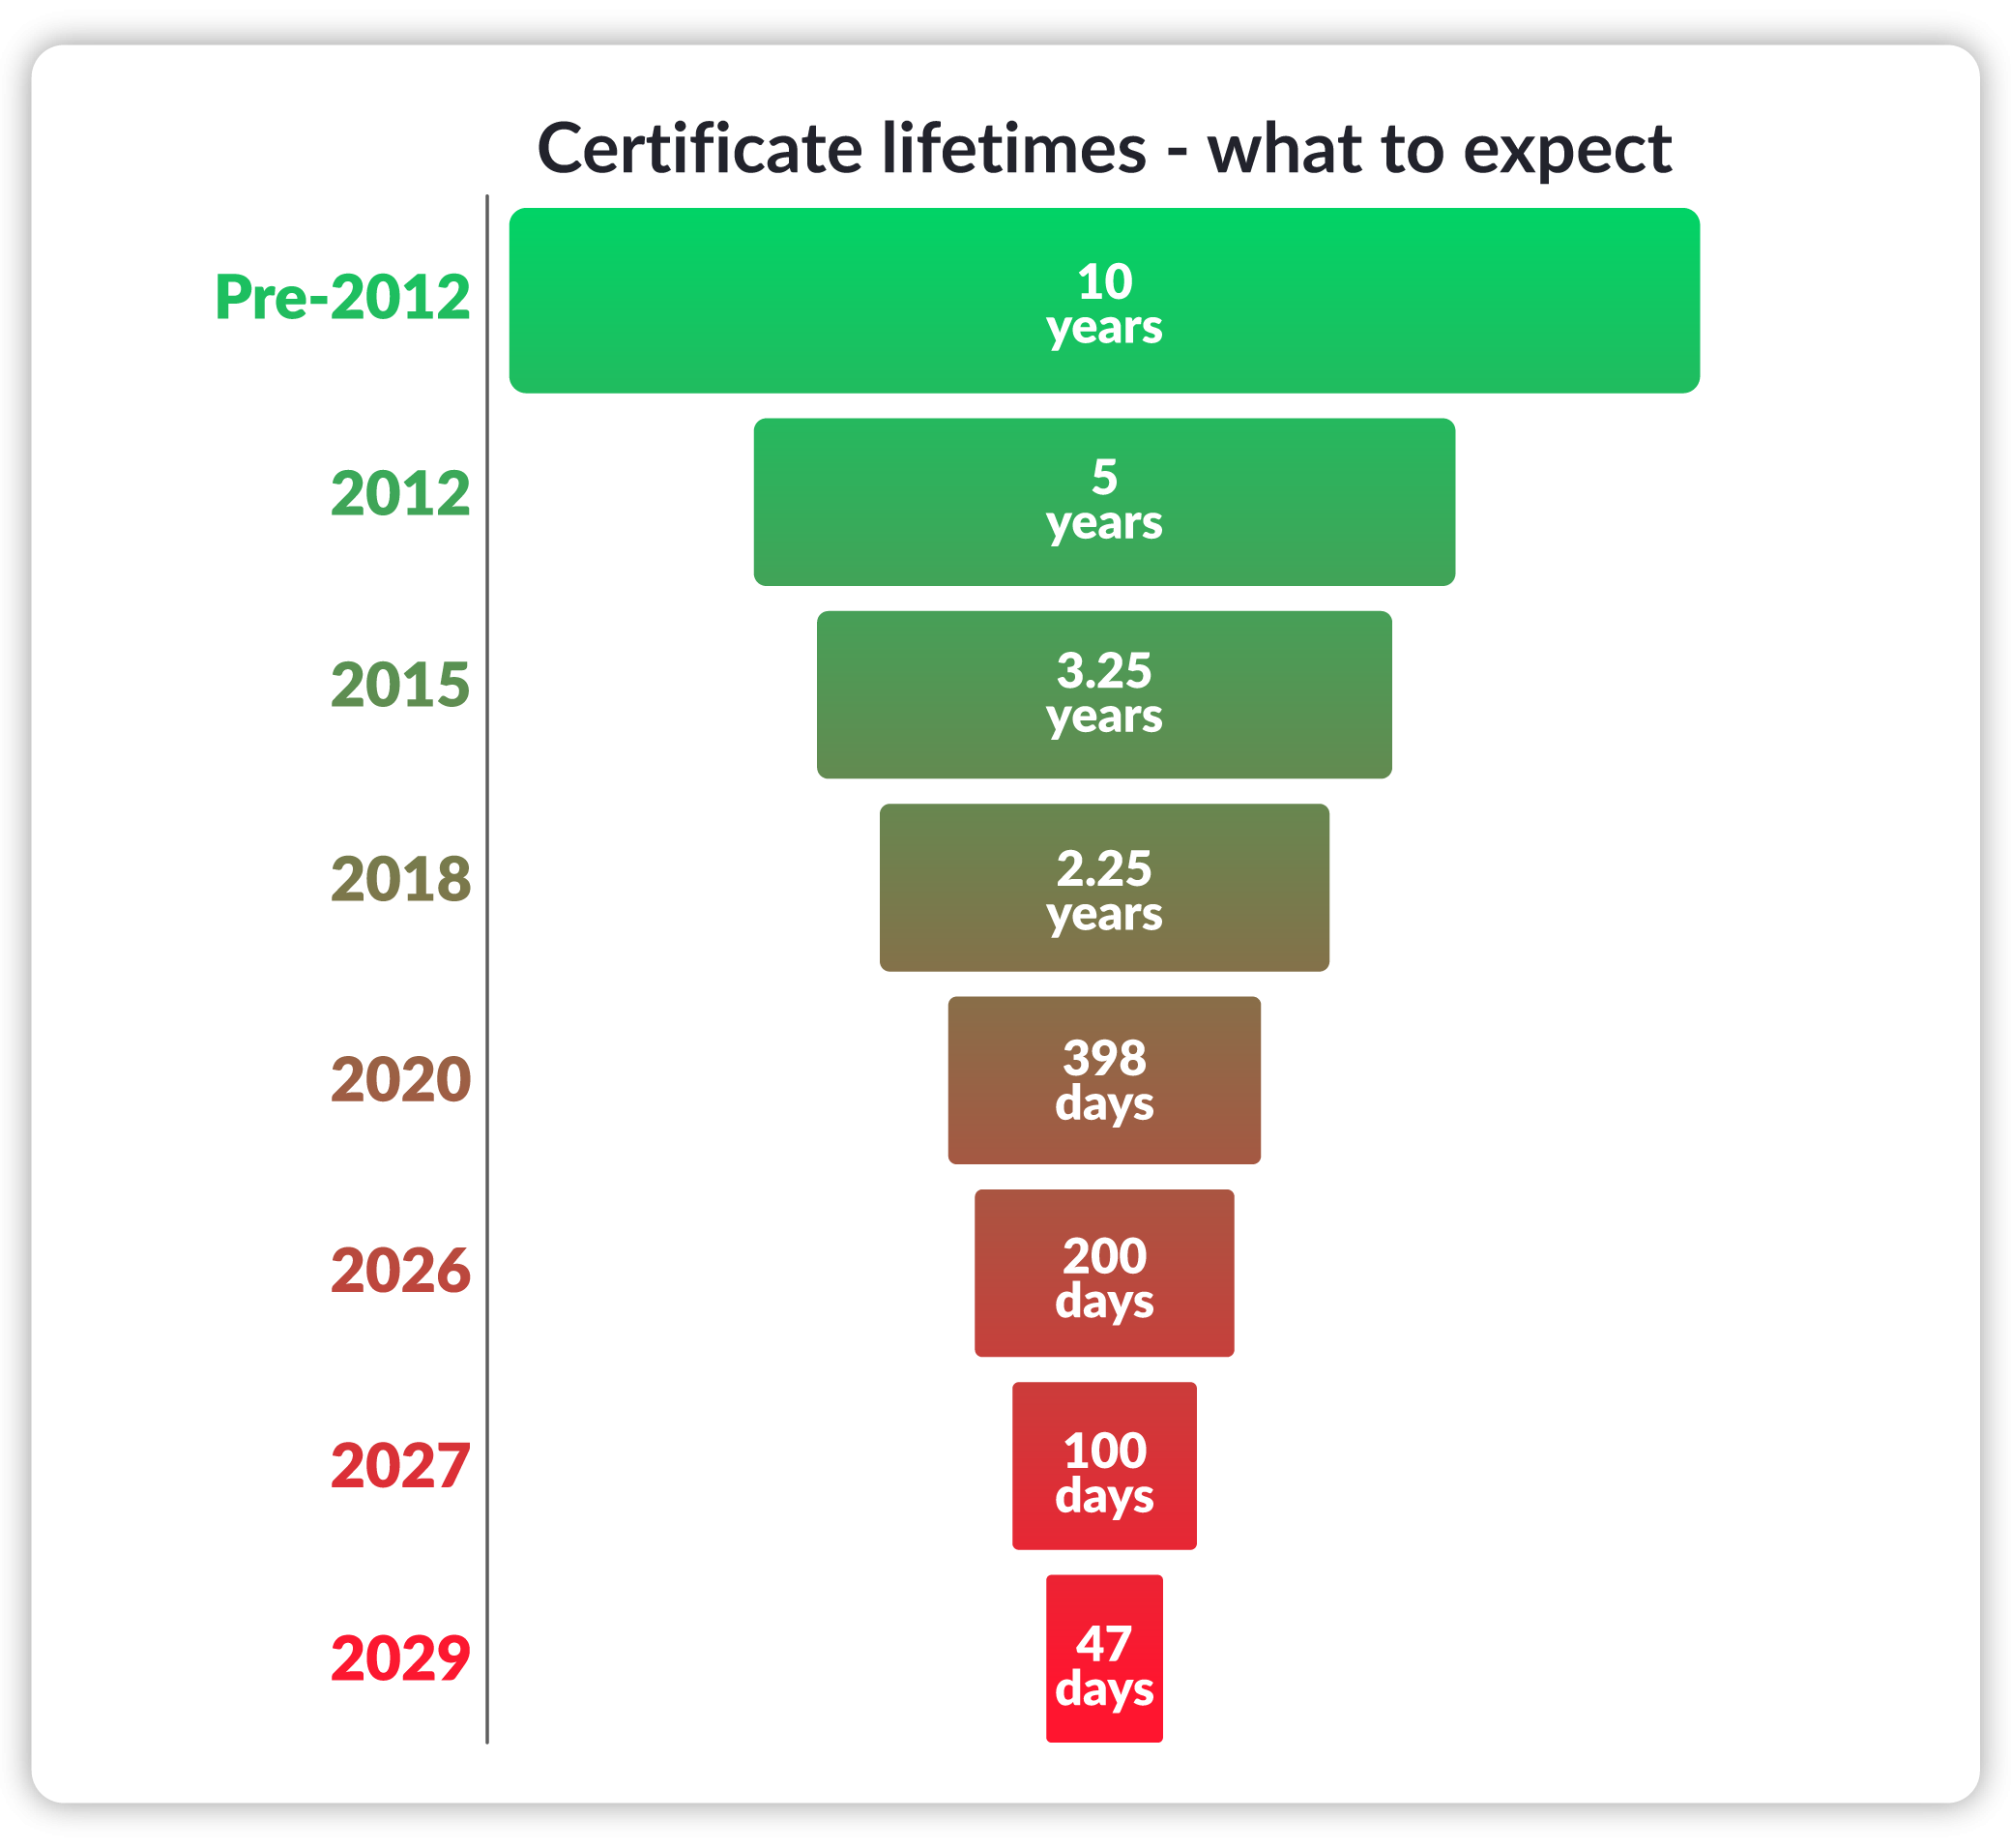
Certificate lifetimes are getting shorter. Manual renewals won't keep up.
What can go wrong?
When SSL is handled manually, even tiny slip-ups can turn into big, public problems:
- Expiry risks: Miss one renewal date and your visitors get hit with a security warning.
- Downtime: An expired certificate can block access, break checkouts, or stop logins cold.
- Operational overhead: Tracking multiple domains becomes a spreadsheet + calendar + stress combo.
- Security gaps: Delays and manual processes increase the chance of misconfigurations and exposure.
Modern browsers like Chrome and Firefox don’t just “suggest” security anymore—they warn users clearly when a site isn’t protected by HTTPS. That can tank trust in seconds. Search engines also factor HTTPS into ranking signals, so insecure sites may lose visibility over time.
And here’s the real shift: infrastructure is now automated. Websites ship via CI/CD pipelines. Servers are containerized. Cloud environments scale on demand. SSL management has to keep up.
That’s where ACME comes in.
What are ACME SSL Certificates?
ACME has become the industry standard for automating certificate issuance and renewals, removing manual errors and aligning SSL with modern, automation-first workflows.
ACME SSL is an automated SSL certificate solution that uses the Automatic Certificate Management Environment (ACME) protocol to issue, validate, and renew certificates without manual intervention.
Instead of manually generating CSRs, uploading certificates, and tracking renewal dates, ACME SSL helps automate the certificate lifecycle through secure, API-based communication between your server and the certificate authority.
ACME SSL is available in two levels of validation:
- DV (Domain Validation): Fast, automated domain validation.
- OV (Organization Validation): Business-validated certificates with organization verification.
- Important: New or updated organisation profiles require validation by the certificate authority. This usually takes at least 48 hours. Validation begins after activation, and OV certificates can be issued only once it’s complete.
2. Is an ACME SSL certificate right for you?
ACME SSL is built for automation. If your infrastructure moves fast, scales often, or runs across multiple domains, ACME can save you serious time (and prevent serious headaches).
ACME SSL is a great fit if you:
- Manage multiple domains or subdomains and don’t want to track renewal dates manually.
- Deploy frequently using CI/CD pipelines, containers, or cloud environments.
- Run SaaS platforms or client websites where uptime and automation matter.
- Need wildcard certificates to secure dynamic subdomains like
app.example.comorapi.example.com. - Prefer DevOps-friendly workflows over manual dashboard installations.
Who typically uses ACME SSL?
- Startups and SaaS companies.
- Agencies managing multiple client environments.
- IT teams handling infrastructure at scale.
- Developers who automate everything (and want SSL to be no exception).
When ACME SSL might not be necessary
If you manage a single static website and rarely make changes, a manually installed SSL certificate may be sufficient. However, even in simple setups, automation reduces the risk of expired certificates and unexpected downtime.
DV or OV — which one should you choose?
- DV (Domain Validation): Ideal for personal websites, internal tools, staging environments, blogs, and projects where fast issuance and automation are the priority.
- OV (Organization Validation): Best for businesses, eCommerce platforms, and customer-facing services that want visible company verification inside the certificate details.
In short: if you want secure HTTPS without babysitting renewals every few months, ACME SSL is built for you.
How to purchase, configure and activate your ACME SSL certificate
ACME SSL allows you to fully automate your SSL certificate lifecycle. No more manual renewals. No more expiry surprises. No more downtime because a certificate was forgotten.
In this guide, we’ll walk you through the entire process — from activating your ACME SSL subscription in EuroDNS to issuing and installing your certificate on a Debian server using Certbot.
Step 1 — Purchase ACME SSL in EuroDNS
Everything starts in your EuroDNS dashboard. Before your server can request a certificate, your subscription must exist, be active, and include the domains you want to secure.
1. Purchase ACME SSL
- Log in to your EuroDNS account.
- Navigate to Products → ACME SSL.
- Select and subscribe to the product.
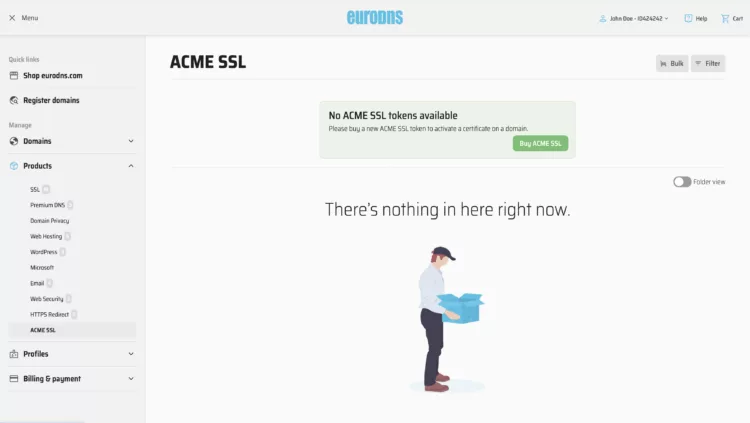
During checkout, you will configure your subscription:
- Validation type: DV for automated domain validation or OV for organization validation.
Important: New or updated organisation profiles require validation by the certificate authority. This usually takes at least 48 hours. Validation begins after activation, and OV certificates can be issued only once it’s complete.
- Wildcard support: Required if you need certificates for subdomains like
*.example.com.
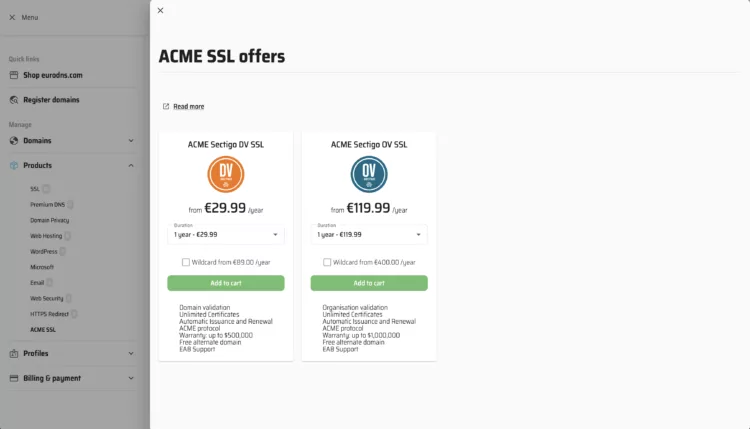
You’ll also select how many domains the subscription should cover. Each ACME SSL subscription can secure up to 200 domains and wildcard entries, making it ideal for multi-domain environments.
Step 2 — Activate your subscription
After completing your purchase, activate the subscription. Without activation, no certificates can be issued.
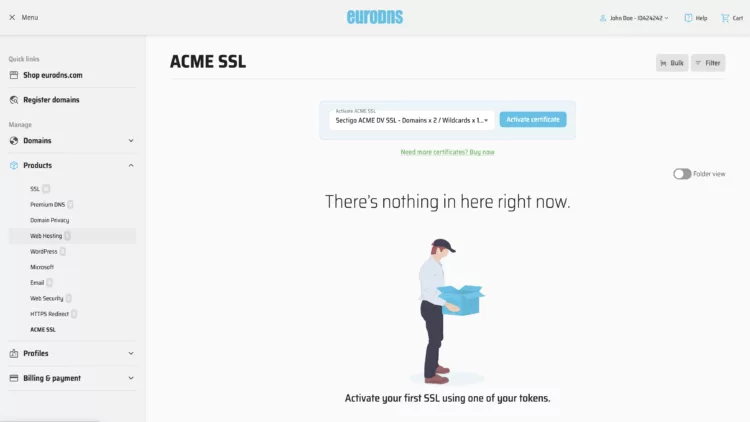
Once activated, you can begin adding domains and retrieving your credentials.
Step 3 — Add your domain(s) to the subscription
This step is essential.
The ACME server will only issue certificates for domains that are listed in your subscription. If a domain is missing here, the certificate request will fail — even if everything on your server is configured correctly.
example.comwww.example.com*.example.com(wildcards require DNS validation)
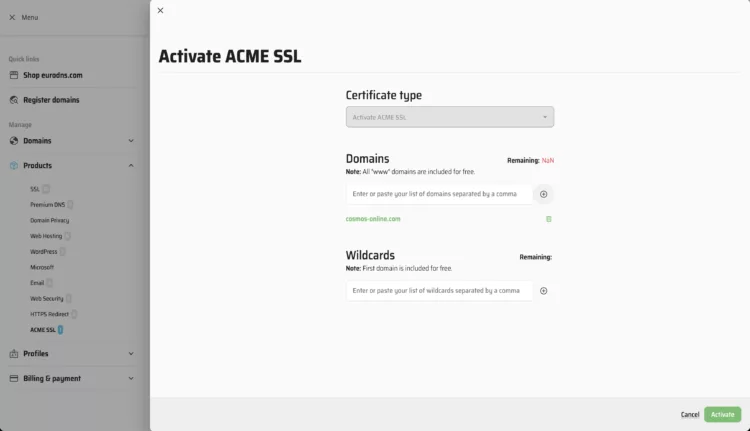
With your domains authorized, your server can now safely connect and request certificates.
Step 4 — Set up an ACME client (using Certbot on Debian)
Set up a client that communicates with the ACME server to handle registration, certificate issuance, and renewals.
In this example, we’ll use Certbot, but there are many other ACME-compatible clients available depending on your setup, such as acme.sh, Caddy, or win-acme. To explore more options, check out this ACME-first cheat sheet from Sectigo.
1. Update your system
sudo apt update
sudo apt upgrade -y
2. Install Certbot
We recommend installing Certbot inside a virtual environment for clean dependency management:
sudo apt install -y python3 python3-pip python3-venv
sudo python3 -m venv /opt/certbot
sudo /opt/certbot/bin/pip install --upgrade pip
sudo /opt/certbot/bin/pip install certbot certbot-nginx
Create a shortcut for easier access:
sudo ln -s /opt/certbot/bin/certbot /usr/bin/certbotVerify installation:
certbot --versionStep 5 — Register your ACME account (one-time setup)
ACME uses External Account Binding (EAB) to securely link your server to your EuroDNS subscription.
Retrieve the following from ACME Accounts & Settings:
- EAB Key ID
- EAB HMAC Key
- ACME Server URL
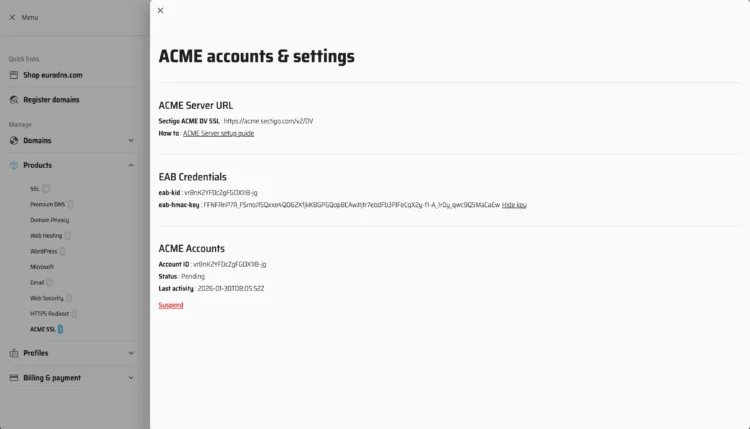
Then register your ACME account:
sudo certbot register \
 --server YOUR_ACME_SERVER_URL \
 --eab-kid YOUR_EAB_KID \
 --eab-hmac-key YOUR_EAB_HMAC_KEY \
 --email admin@example.com \
 --agree-tos \
 --non-interactive
This step only needs to be done once. Certbot will store the account locally and reuse it for all future renewals.
Step 6 — Generate your certificate
Now that your ACME account is registered, you’re ready to issue your first certificate.
ACME supports different validation methods. The one you choose depends on your setup and whether you're securing standard domains or wildcard domains.
- HTTP challenge — Recommended for standard domains like
example.comandwww.example.com. - DNS challenge — Required for wildcard certificates like
*.example.com.
Option A — HTTP challenge (standard domains)
Use this method if your server is publicly reachable over port 80. Certbot will temporarily place a validation file in your web root to prove domain ownership.
Generate the certificate
sudo certbot certonly \
 --webroot \
 -w /var/www/example.com \
 --server YOUR_ACME_SERVER_URL \
 --email admin@example.com \
 --agree-tos \
 --non-interactive \
 -d example.com \
 -d www.example.com
If successful, your certificate files will be stored in:
/etc/letsencrypt/live/example.com/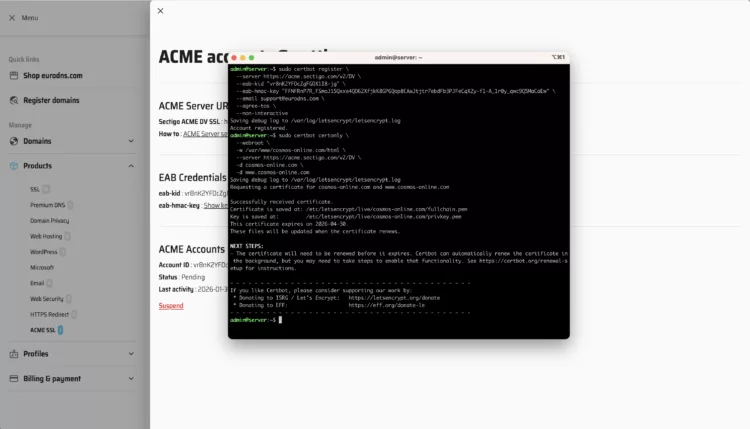
Behind the scenes, the ACME server checks that your domain serves the validation token correctly. Once confirmed, the certificate is issued immediately.
Option B — DNS challenge (wildcard certificates)
Wildcard certificates require DNS validation. Instead of placing a file on your server, Certbot creates a temporary DNS TXT record to prove ownership.
Install the EuroDNS DNS plugin
sudo /opt/certbot/bin/pip install certbot-dns-eurodnsCreate a secure API credentials file
sudo mkdir -p /etc/letsencrypt/secrets
sudo chmod 700 /etc/letsencrypt/secrets
sudo nano /etc/letsencrypt/secrets/eurodns.ini
Add your credentials:
dns_eurodns_applicationId = YOUR_APP_ID
dns_eurodns_apiKey = YOUR_API_KEY
Secure the file:
sudo chmod 600 /etc/letsencrypt/secrets/eurodns.iniGenerate the wildcard certificate
sudo certbot certonly \
 -a dns-eurodns \
 --dns-eurodns-credentials /etc/letsencrypt/secrets/eurodns.ini \
 --dns-eurodns-propagation-seconds 60 \
 --server YOUR_ACME_SERVER_URL \
 --email admin@example.com \
 --agree-tos \
 --non-interactive \
 -d example.com \
 -d "*.example.com"
Certbot will automatically create and remove the required DNS TXT record using the EuroDNS API.
Step 7 — Confirm account status in your dashboard
Return to your EuroDNS dashboard and refresh ACME Accounts & Settings.
Your ACME account status should now show as Valid, confirming that your server is successfully linked to your subscription.
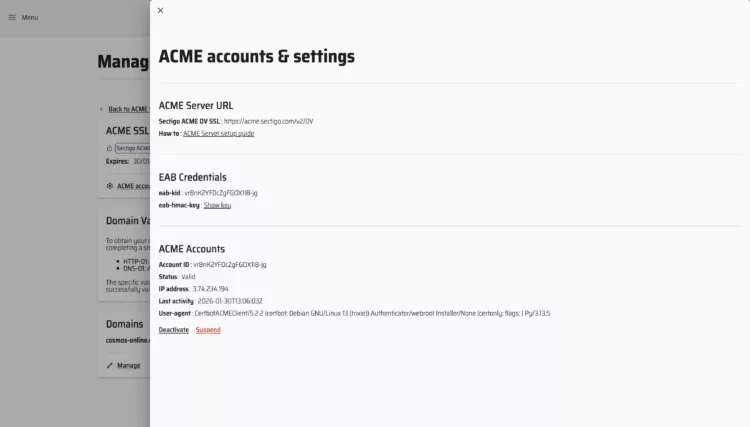
Step 8 — Configure nginx for HTTPS
Now that your certificate has been issued, update your nginx configuration to use it.
ssl_certificate /etc/letsencrypt/live/example.com/fullchain.pem;
ssl_certificate_key /etc/letsencrypt/live/example.com/privkey.pem;
After updating your configuration:
sudo nginx -t
sudo systemctl reload nginx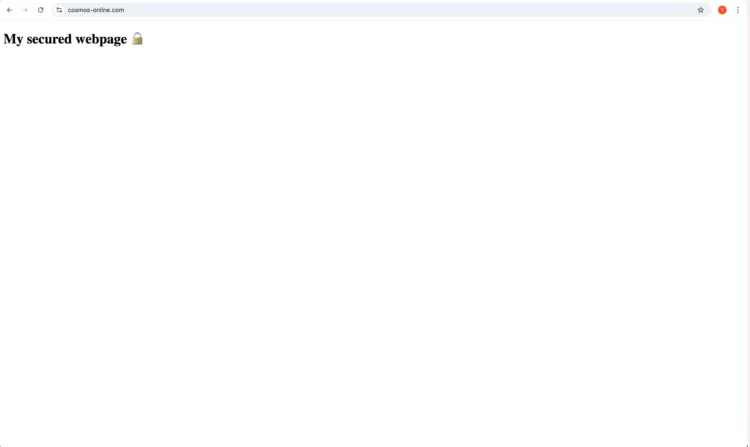
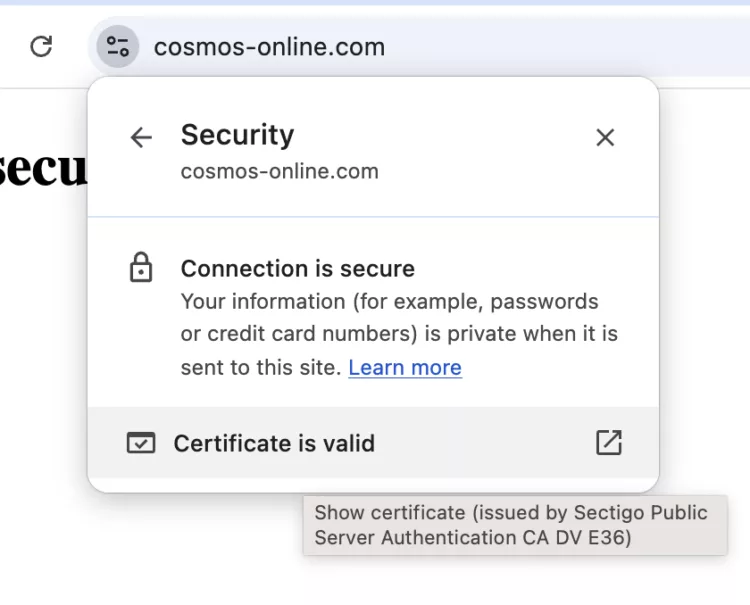
Visit your website and click the padlock icon in your browser to confirm the certificate is active.
Step 9 — Enable automatic renewal
ACME certificates are valid for 90 days. Automation ensures they renew automatically before expiry.
Test renewal safely using:
sudo certbot renew --dry-runIf the dry run completes successfully, your renewal process is fully automated.
Common issues and quick fixes
- Domain not added to the ACME SSL subscription
- Incorrect EAB credentials
- Port 80 blocked for HTTP validation
- DNS propagation delays for wildcard certificates
- Incorrect file permissions on API credentials
If something fails, review:
/var/log/letsencrypt/letsencrypt.log
/var/log/nginx/error.log
Final checklist
- ACME SSL subscription activated
- Domains added to the subscription
- Certbot installed
- ACME account registered
- Certificate successfully issued
- nginx configured for HTTPS
- Automatic renewal tested
You now have a fully automated, industry-standard SSL setup aligned with modern DevOps workflows.
Introducing Our New Shared Hosting: Built for Growth
AI.com sold for $70 million. Then Reddit chimed in.