How to Build Your Own Linux Web Server: From Setup to Going Live

Learn how to build your own Linux web server from scratch: setup, networking, Apache vs Nginx, and going live with a custom domain. A step-by-step guide for hosting websites securely and reliably on Linux.
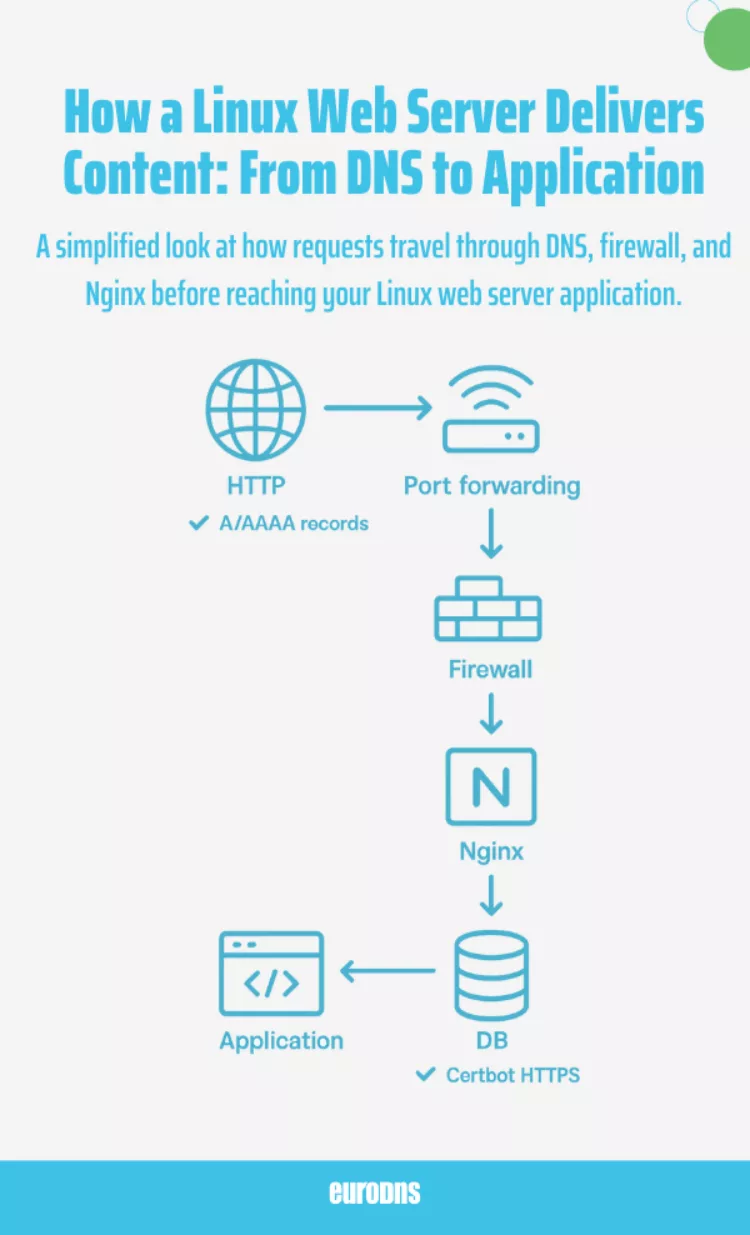
A web server stores your site’s files and delivers them to visitors over HTTP/HTTPS. It processes browser requests, serves static assets, and runs dynamic applications—powering everything from personal blogs to full-scale SaaS. If you’re asking “Can I host my website on a Linux computer?”, the answer is yes: Linux provides a stable, secure, and cost-effective foundation for reliable hosting at home, in the office, or in the cloud.
Quick Checklist: Build Your Linux Web Server
- ✅ Choose a Linux distro (Ubuntu, Debian, AlmaLinux).
- ✅ Install and harden the server (updates, users, SSH, firewall).
- ✅ (Optional) Create a virtual server with VirtualBox/VMware/KVM.
- ✅ Assign a static IP and confirm network connectivity.
- ✅ Install web server software (Apache or Nginx).
- ✅ Configure a test site and verify it loads locally.
- ✅ Forward ports 80/443 and update firewall rules.
- ✅ Register a domain and point DNS to your server’s IP.
- ✅ Enable HTTPS with Let’s Encrypt for security.
- ✅ (Optional) Install WordPress or another CMS.
- ✅ Monitor logs and system health regularly.
1) Server Setup
Building your own server starts with installing a Linux distribution, hardening the system, and ensuring secure remote access.
Choose a Linux Distribution
- Ubuntu Server: Beginner-friendly, excellent documentation.
- Debian: Very stable, long release cycles.
- AlmaLinux/Rocky Linux: RHEL-compatible, enterprise-leaning.
Post-Install Hardening Checklist
Update packages:
# Debian/Ubuntu
sudo apt update && sudo apt upgrade -y
# RHEL family (Alma/Rocky)
sudo dnf upgrade -y
Create a non-root sudo user:
sudo adduser <youruser>
sudo usermod -aG sudo <youruser>    # Debian/Ubuntu
# On RHEL family use: sudo usermod -aG wheel <youruser>
Secure SSH:
# Create an SSH key on your laptop/workstation (if you don't have one)
ssh-keygen -t ed25519
# Copy your key to the server
ssh-copy-id <youruser>@<server-ip>
# Edit SSH config (server)
sudo nano /etc/ssh/sshd_config
# Recommended changes:
#   PermitRootLogin no
#   PasswordAuthentication no   (after keys are confirmed working)
#   Port 22   (optionally change to a high, non-default port)
sudo systemctl restart ssh    # or: sudo systemctl restart sshd
Enable a firewall:
# Debian/Ubuntu with UFW
sudo apt install ufw -y
sudo ufw allow OpenSSH
sudo ufw enable
sudo ufw status
# RHEL family with firewalld
sudo dnf install firewalld -y
sudo systemctl enable --now firewalld
sudo firewall-cmd --permanent --add-service=ssh
sudo firewall-cmd --reload
Enable unattended security updates (Debian/Ubuntu):
sudo apt install unattended-upgrades -y
sudo dpkg-reconfigure --priority=low unattended-upgrades
2) Create a Virtual Linux Server (Optional)
If you don’t want to repurpose physical hardware, run Linux in a virtual machine (VM) on your workstation or a hypervisor.
- Local desktop: VirtualBox (free), VMware Workstation/Fusion.
- Bare-metal hypervisor: Proxmox VE, VMware ESXi, Hyper-V.
- Linux-native: KVM/QEMU with virt-manager.
Suggested VM resources (small sites): 2 vCPU, 4 GB RAM, 20–40 GB storage, bridged networking for LAN visibility.
3) Create a Network on Linux
Assign a static IP so the server is consistently reachable. On Ubuntu with Netplan:
# /etc/netplan/01-netcfg.yaml
network:
  version: 2
  ethernets:
    eth0:
      dhcp4: no
      addresses:
        - 192.168.1.100/24
      gateway4: 192.168.1.1
      nameservers:
                        addresses: [8.8.8.8, 1.1.1.1]
sudo netplan apply
ip a # verify address
ping -c 3 1.1.1.1
ping -c 3 example.com4) Web Server Software
On Linux, the two primary web servers are Apache HTTP Server and Nginx.
Apache vs Nginx: Which One?
Verdict: For high-traffic/static-heavy sites or as a reverse proxy, Nginx shines. For deep per-directory customization and legacy app compatibility, Apache is often simpler. Many stacks use Nginx in front of Apache to combine strengths.
Apache vs Nginx Comparison
Feature | Apache HTTP Server | Nginx |
|---|---|---|
Release Year | 1995 | 2004 |
Performance Model | Process-based (one thread per connection) | Event-driven (handles many connections in one process) |
Strengths | Highly flexible, mature modules, .htaccess per-directory rules | High concurrency, lightweight, excellent for static content & reverse proxying |
Best Use Cases | WordPress, PHP applications, legacy apps | High-traffic static sites, load balancer, API gateway |
Configuration | Text files, allows per-folder overrides | Centralized configs, faster but less granular per-folder flexibility |
Install Nginx on Ubuntu
sudo apt update
sudo apt install nginx -y
sudo systemctl enable nginx
sudo systemctl start nginx
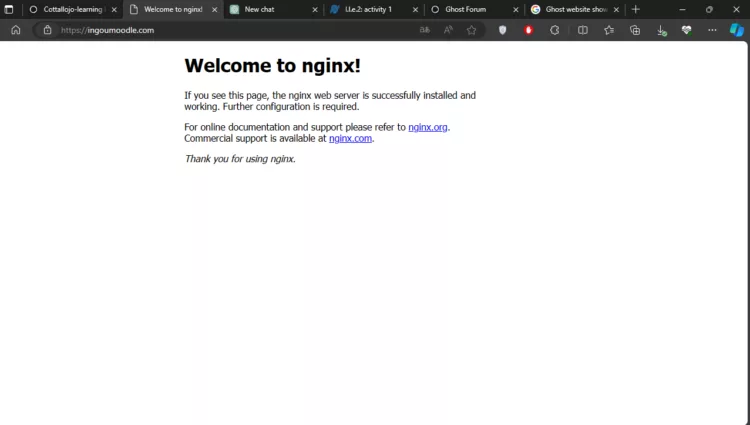
systemctl status nginxBrowse to http://<server-ip> to see the default Nginx page. Your default doc root is typically /var/www/html.
Basic Nginx Server Block
# example site config
                sudo nano /etc/nginx/sites-available/example.conf
server {
listen 80;
server_name example.com www.example.com;
root /var/www/example;
index index.html;
location / {
try_files $uri $uri/ =404;
}
}sudo mkdir -p /var/www/example
echo "<h1>Hello from Nginx</h1>" | sudo tee /var/www/example/index.html
sudo ln -s /etc/nginx/sites-available/example.conf /etc/nginx/sites-enabled/example.conf
sudo nginx -t
sudo systemctl reload nginx5) Going Live
Make your server reachable on the public internet with router port forwarding, firewall rules, and a domain name.
Port Forwarding
- Log in to your router’s admin UI.
- Forward external TCP 80 → server IP:80 and TCP 443 → server IP:443.
- Ensure your server has a static/reserved IP (LAN).
Firewall Rules
# UFW (Ubuntu/Debian)
sudo ufw allow 80/tcp
sudo ufw allow 443/tcp
sudo ufw status
# firewalld (RHEL family)
sudo firewall-cmd --permanent --add-service=http
sudo firewall-cmd --permanent --add-service=https
sudo firewall-cmd --reload
Run and Monitor the HTTP Service
sudo systemctl restart nginx
sudo systemctl status nginx
journalctl -u nginx --since "10 min ago"   # recent logs
ss -tulpn | grep :80                       # confirm listener
Create a Domain “Server” (DNS + Domain)
- Register a domain of your choice.
- Point DNS “A” records (and AAAA for IPv6) to your public IP:
@→ your.public.ipwww→ your.public.ip
- Wait for propagation (often minutes, up to 24 hours).
certbot) and redirect HTTP → HTTPS for security and SEO benefits.Optional: Run Your Own DNS (Advanced)
If you need local control (lab or self-hosting at scale), install BIND9 or another authoritative DNS server and create zones for your domain. For most small sites, using your registrar’s DNS is simpler and more reliable.
6) How to Run HTTP in Linux (Service Management)
Manage the web server daemon with systemd:
# Nginx examples
sudo systemctl start nginx
sudo systemctl stop nginx
sudo systemctl reload nginx
sudo systemctl enable nginx
sudo systemctl status nginx
If using Apache instead:
sudo systemctl start apache2        # Debian/Ubuntu
sudo systemctl start httpd          # RHEL family
Running WordPress on Your Linux Web Server
WordPress is the most popular CMS on the web, and Linux servers are its natural home. To install it, you’ll typically set up a LAMP (Linux, Apache, MySQL/MariaDB, PHP) or LEMP (Linux, Nginx, MySQL/MariaDB, PHP) stack.
Basic WordPress Setup Steps:
Install PHP and MySQL/MariaDB:
sudo apt install php php-mysql mariadb-server -y
sudo mysql_secure_installation
Create a WordPress database:
CREATE DATABASE wordpress;
CREATE USER 'wpuser'@'localhost' IDENTIFIED BY 'strongpassword';
GRANT ALL PRIVILEGES ON wordpress.* TO 'wpuser'@'localhost';
FLUSH PRIVILEGES;
Download WordPress:
cd /var/www/ sudo wget https://wordpress.org/latest.tar.gz sudo tar -xvzf latest.tar.gz sudo chown -R www-data:www-data wordpress- Configure your web server (Apache VirtualHost or Nginx Server Block) to point to
/var/www/wordpress. - Run the setup by visiting
http://yourdomain.comand following the installation wizard.
Once complete, you’ll have a fully functioning WordPress site running on your Linux server. You can enhance it with themes, plugins, and SSL via Let’s Encrypt.
7) Advanced Integration: Join Linux to a Windows Domain
Integrate with Active Directory (AD) for centralized authentication using realmd and SSSD (Kerberos/LDAP under the hood).
# Install packages (Ubuntu example)
sudo apt update
sudo apt install -y realmd sssd sssd-tools adcli oddjob oddjob-mkhomedir packagekit \
  samba-common-bin krb5-user
# Discover the AD domain
realm discover YOUR.DOMAIN
# Join the domain (you'll be prompted for a domain admin password)
sudo realm join YOUR.DOMAIN -U Administrator
# Verify
realm list
id "YOURDOMAIN\\someuser"
You can then allow AD groups to log in, auto-create home directories, and use Kerberos SSO for services that support it. This is useful in mixed Windows/Linux environments.
Troubleshooting Quick Wins
- Can’t reach site externally? Confirm public IP, router forwarding, and that ISP doesn’t block ports 80/443. Test with a mobile connection (not on your Wi-Fi).
- Service won’t start? Check syntax:
nginx -t(Nginx) orapachectl configtest(Apache), thenjournalctl -xe. - DNS not resolving? Verify A/AAAA records and TTLs. Use
digornslookupfrom an external network. - Permission errors serving files? Ensure web root and files are readable by the web server user (e.g.,
www-data).
Helpful Links & Resources
- Ubuntu Server Documentation
- Apache HTTP Server Documentation
- Nginx Documentation
- Certbot (Let’s Encrypt TLS/SSL)
- WordPress Installation Guide
- MariaDB Knowledge Base
Conclusion
You’ve taken a Linux system from fresh install to a live website: hardened SSH access, configured a static network, installed and tuned your web server, opened the right ports, and mapped a domain name. Whether you choose Apache, Nginx, or a hybrid reverse-proxy architecture, Linux gives you the stability and flexibility to scale from a personal project to production-ready hosting. With optional AD integration, your server can also plug into enterprise identity workflows.
Next steps: add HTTPS with an ACME client, set up automated backups, and consider a reverse proxy + application layer (PHP-FPM, Node.js, Python WSGI) for dynamic apps.
Back to Basics Web Hosting and Control Panels Explained