Create your own email domain: 2026 Guide

Setting up a personal email domain is easier than you might think. With the right guidance, you can have it up and running quickly.
A custom email domain is one of the simplest upgrades you can make online. It makes you look more professional, more trustworthy, and more established—whether you’re building a business, freelancing, or just tired of “firstname123@gmail.com.”
Instead of a generic address, you get something that actually belongs to you: you@yourdomain.com. It’s easier to remember, it reinforces your identity every time you hit send, and it gives you more control over how you communicate.
Good news: setting up a personal or professional email domain is not complicated. This guide walks you through the whole process, step by step. If you want a broader overview too, see Business Email Setup: A Step-by-Step Guide.
Why create a personal or professional email domain?
Your email address is part of your brand. And like it or not, people judge it.
A custom email domain helps because it:
- Builds trust (you look serious, not temporary).
- Improves brand recognition (every email becomes a mini billboard).
- Gives you control (addresses, access, security, and setup rules).
Here are three deep dives into the “why” here:
- Top 4 Benefits of Using a Custom Email Domain
- Professional Business Email: Domain Name Specific vs. Free Email
- Customised professional email address builds trust
And yes—you can create addresses for different needs:
- info@yourdomain.com
- support@yourdomain.com
- firstname.lastname@yourdomain.com
What you need before you start
Two things: a domain, and an email service.
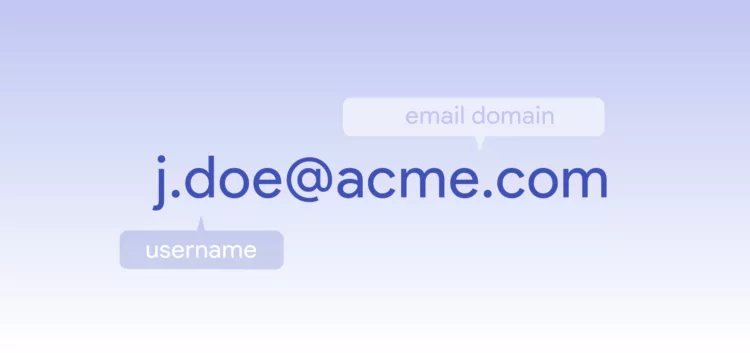
Your domain is what comes after the “@”. If you don’t have one yet, pick something clean, readable, and aligned with your project.
Then you’ll connect that domain to an email provider—either a dedicated email solution like EuroDNS Email Cloud Suite or another service.
Quick checklist:
- A domain name you want to use for email
- Access to your domain’s DNS settings
- An email provider (Email Cloud Suite, Google Workspace, Microsoft 365, etc.)
- A plan for email authentication (SPF/DKIM/DMARC)
If you already own a domain and want ideas for what to do with it beyond email, start here: You’ve Registered a Domain—Now What? 4 Smart Ways to Use It.
Step 1: Choose and register your domain name
Your domain name is your identity. Keep it easy to spell, easy to say, and hard to misunderstand.
If you’re stuck choosing an extension, this is a good starting point: 8 Domain Extensions That Are Underrated (But Powerful).
Key considerations
- Readable beats clever
- Avoid unnecessary hyphens and weird spelling
- Pick a TLD that matches your audience and intent
Step 2: Choose an email provider
Pick based on what you actually need: security, reliability, admin controls, storage, and support.
If you want a guided overview of setup decisions (and what matters most), use: Business Email Setup: A Step-by-Step Guide.
What to look for
- Security (2FA, spam protection, SPF/DKIM/DMARC support)
- Reliability (uptime and deliverability)
- Admin controls (especially if you have a team)
- Support (you will appreciate this when something breaks)
If your domain is with EuroDNS, you may be able to set up a branded mailbox quickly. Start here: How to enable your free branded email account.
Step 3: Connect your domain to email (DNS setup)
This is the “make it actually work” step. You’ll add DNS records that tell the internet where your email lives and how to trust it.
At minimum, you’ll usually configure:
- MX records: route email to your mail server
- SPF: define who can send email for your domain
- DKIM: sign outgoing email to prove authenticity
- DMARC: tell inboxes what to do when SPF/DKIM fail
Need a simple starting point? Read: What Are MX Records and How to Use Them.
Want the “DNS basics” version first? Use: How DNS Resolution Works.
Bloon tip: DNS changes can take a little time to propagate. Test sending and receiving before you announce your new email address everywhere.
Step 4: Create your custom email addresses
Now the fun part: create mailboxes (or aliases) that match how you work.
Email address ideas
- yourname@yourdomain.com
- support@yourdomain.com
- sales@yourdomain.com
- billing@yourdomain.com
If you run a business, role-based addresses like support@ and billing@ keep things stable even when staff changes.
Step 5: Use it daily (and keep it secure)
Access your email through webmail or an email client like Outlook or Thunderbird. Your provider will give you IMAP/SMTP settings if needed.
Then stay on top of the basics:
- Use strong passwords and enable 2FA
- Review forwarding rules (they’re a common security weak point)
- Keep SPF/DKIM/DMARC in place to protect deliverability
For extra domain-level protection, DNSSEC is worth understanding: DNSSEC Protects Your Domain from DNS Vulnerabilities.
Free vs. paid email domain services
Free email can work for basic needs. But if your email is tied to money, customers, or reputation, paid services usually win on reliability, support, security, and control.
If you want the cleanest “why” argument for domain email, this article is your friend: Top 4 Benefits of Using a Custom Email Domain.
Frequently asked questions
Do I need a domain to create a professional email address?
Yes. Your email domain is the part after “@”. If you want “name@yourbrand.com,” you need to own yourbrand.com (or another extension). See: Professional Business Email: Domain Name Specific vs. Free Email.
How long does setup take?
Often the same day. DNS changes are usually the slowest part because propagation can take time.
Do I need technical skills?
Basic comfort in an admin panel helps, but you don’t need to be a sysadmin. If you get stuck, these are the two most helpful starting points: MX records and DNS resolution.
Conclusion: Your email should work for you
A custom email domain is one of the fastest ways to level up your online presence. It builds trust, strengthens branding, and gives you long-term control.
If you want a simple next step, start with Business Email Setup: A Step-by-Step Guide, then set up your mailbox using How to enable your free branded email account.
Top Domains for Musicians: Hit the Right Note Online
Related articles: